
Linework Quilt
When I was studying fine art at school, I was really inspired by the Op Art movement of the 1960s and absolutely loved the use of seemingly simple contrasting lines to create complex works of art. While I was doodling ideas for new beginner Foundation Paper Piecing blocks, I kept coming back to that idea of a creating a maze by using simple lines which would become more complex in combination. A maze like this would draw your eyes in all sorts of different directions with a medley of twists and turns. A few rounds of refining and the Linework Quilt was born!
Perfect for confident beginner quilters and beyond, Linework is a choose-your-own-adventure block based FPP quilt. Have a play and spin your blocks around, go monochrome or switch it up with a fun rainbow for a striking and graphic quilt that will be totally unique to you. This quilt is all about making your own rules.
The details
The pattern includes four sizes: Cushion, Wall Hanging, Baby and Throw, but - as one of my testers shows - you can go rogue to make whatever size you want with whatever combination of blocks you want - which is exactly what I love most about a choose-your-own-adventure pattern, everyone ends up somewhere different!
Fabric requirements are given for both a monochrome and rainbow version, but they are very much guidelines as this pattern really encourages you to play around and make it your own in every way. It’s written to be Fat Quarter friendly, but it’s also suitable for scraps so you can really put your own spin on it to make it 100% your own.
Nervous to try FPP? Check out my step-by-step how to FPP guide (plus get a free heart block).


Choosing my fabrics
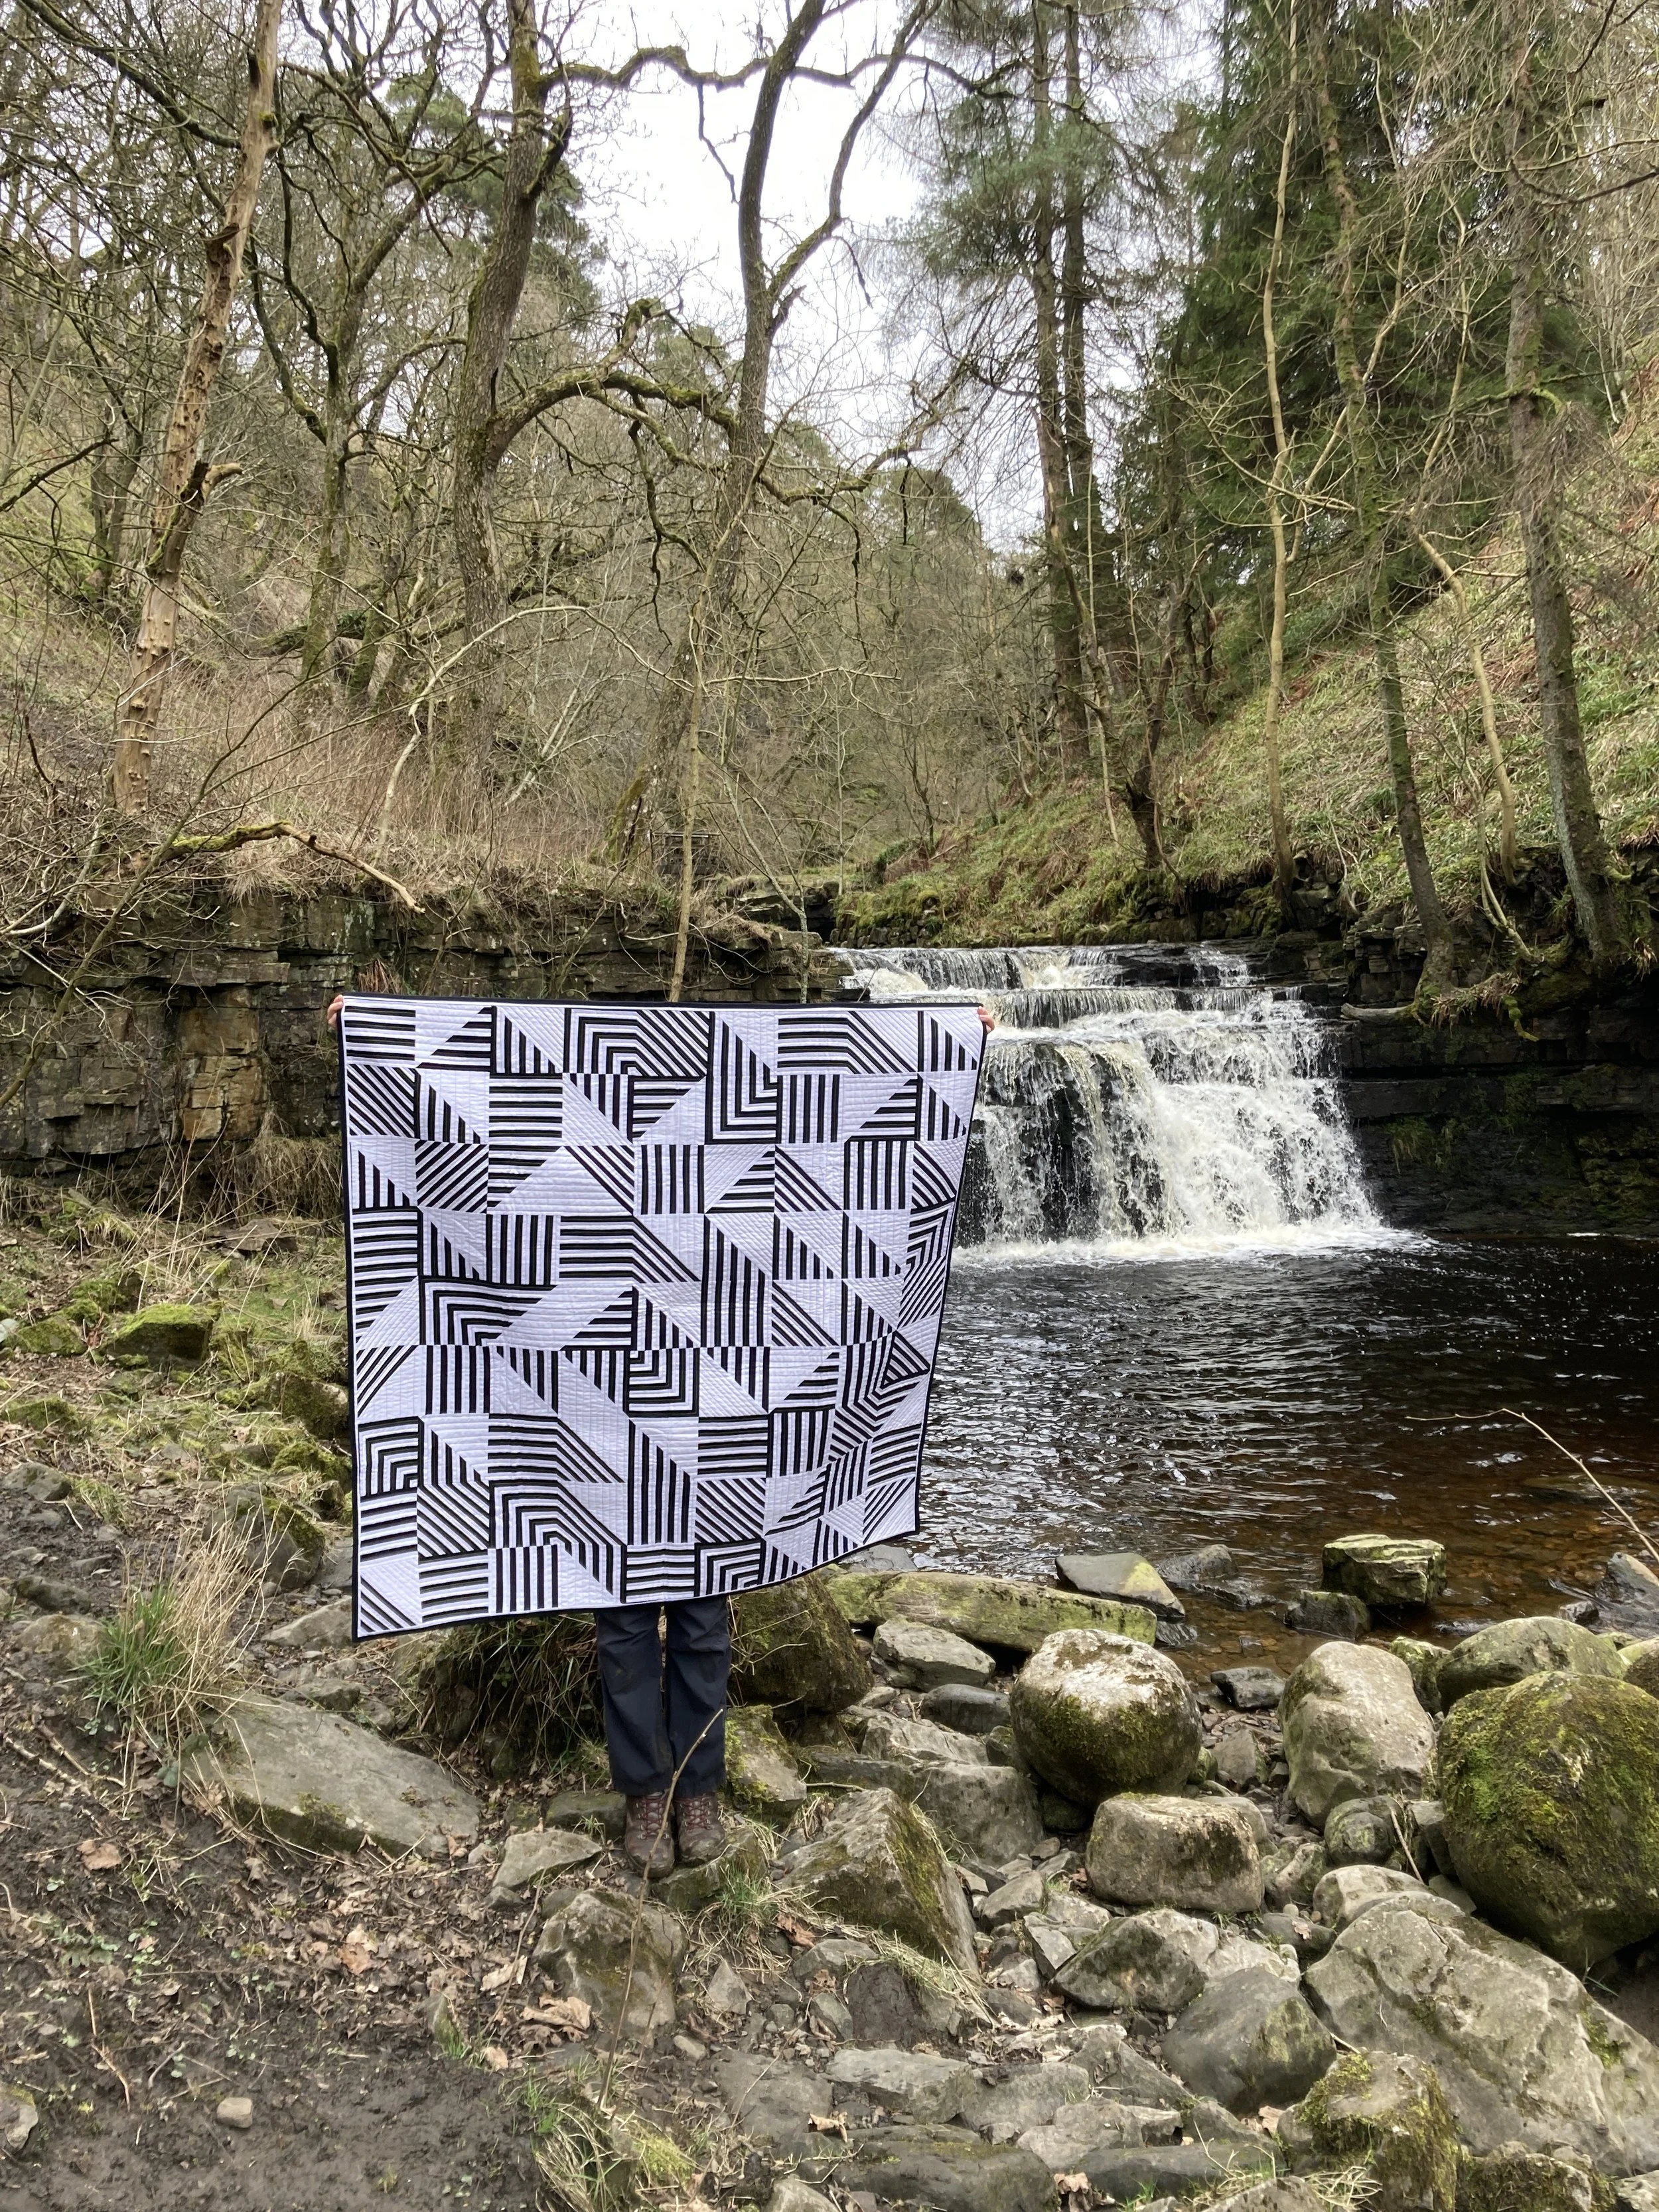
This pattern really lends itself to ombré effects (scroll down for some fun colour inspiration), but I could not get a black and white version out of my head when I first designed the Linework quilt. Despite it being completely out of my colour comfort zone I knew I just HAD to go monochrome when it came to pulling fabric for my sample!
Fabric choice: I used Moda Bella White Bleached and Black for my blocks, backing and binding.
Here are the all fabric requirements to get you started - based on fat quarters and eighths, these are intended to give you an indication of how much fabric you’ll need in total. If you’re going scrappy or mixing and matching your colour placement then you might need more or less of some colours - feel free to go wild! The pattern includes how much you’ll need for each of the five blocks to help you design your own super unique version.


Piecing
There are lots of reasons to love FPP, but my absolute top one is how super precise it is and how it makes getting matching seams so much easier. I also love that it’s really easy to do just a little bit at a time as the mood strikes and not have to worry about remembering which part of the pattern you were working on the next time you sit down at your machine! I really enjoyed chipping away at my blocks over about a week until I had what I needed, just focussing on making a few blocks at a time.
So I have a confession to make - when I was making my sample, I made a pretty random amount of each block until I had the total I needed for the throw size with no real overall design plan (this really is a make your own rules quilt!), so when it came to laying out my top is where the fun really began for me! I spent ages laying out different arrangements on my “design floor” (maybe one day I’ll make myself a design wall like a grown-up quilter), twisting and turning blocks this way and that until something clicked in my head and said “that’s it!”. It was also rather nice knowing that if any of my blocks did their usual magic trick of spinning around between being laid out and getting under my needle it wouldn’t matter as there really isn’t a “correct” way to lay out this quilt.
Top Tip
Make sure you have a seam roller! Getting up and down to use the iron for every seam would have driven me batty and my trusty seam roller was a life saver. You can get plastic versions of these from the various big sewing brands, but I prefer my wooden one that is actually meant for smoothing wallpaper seams and came from a hardware store.


Quilting
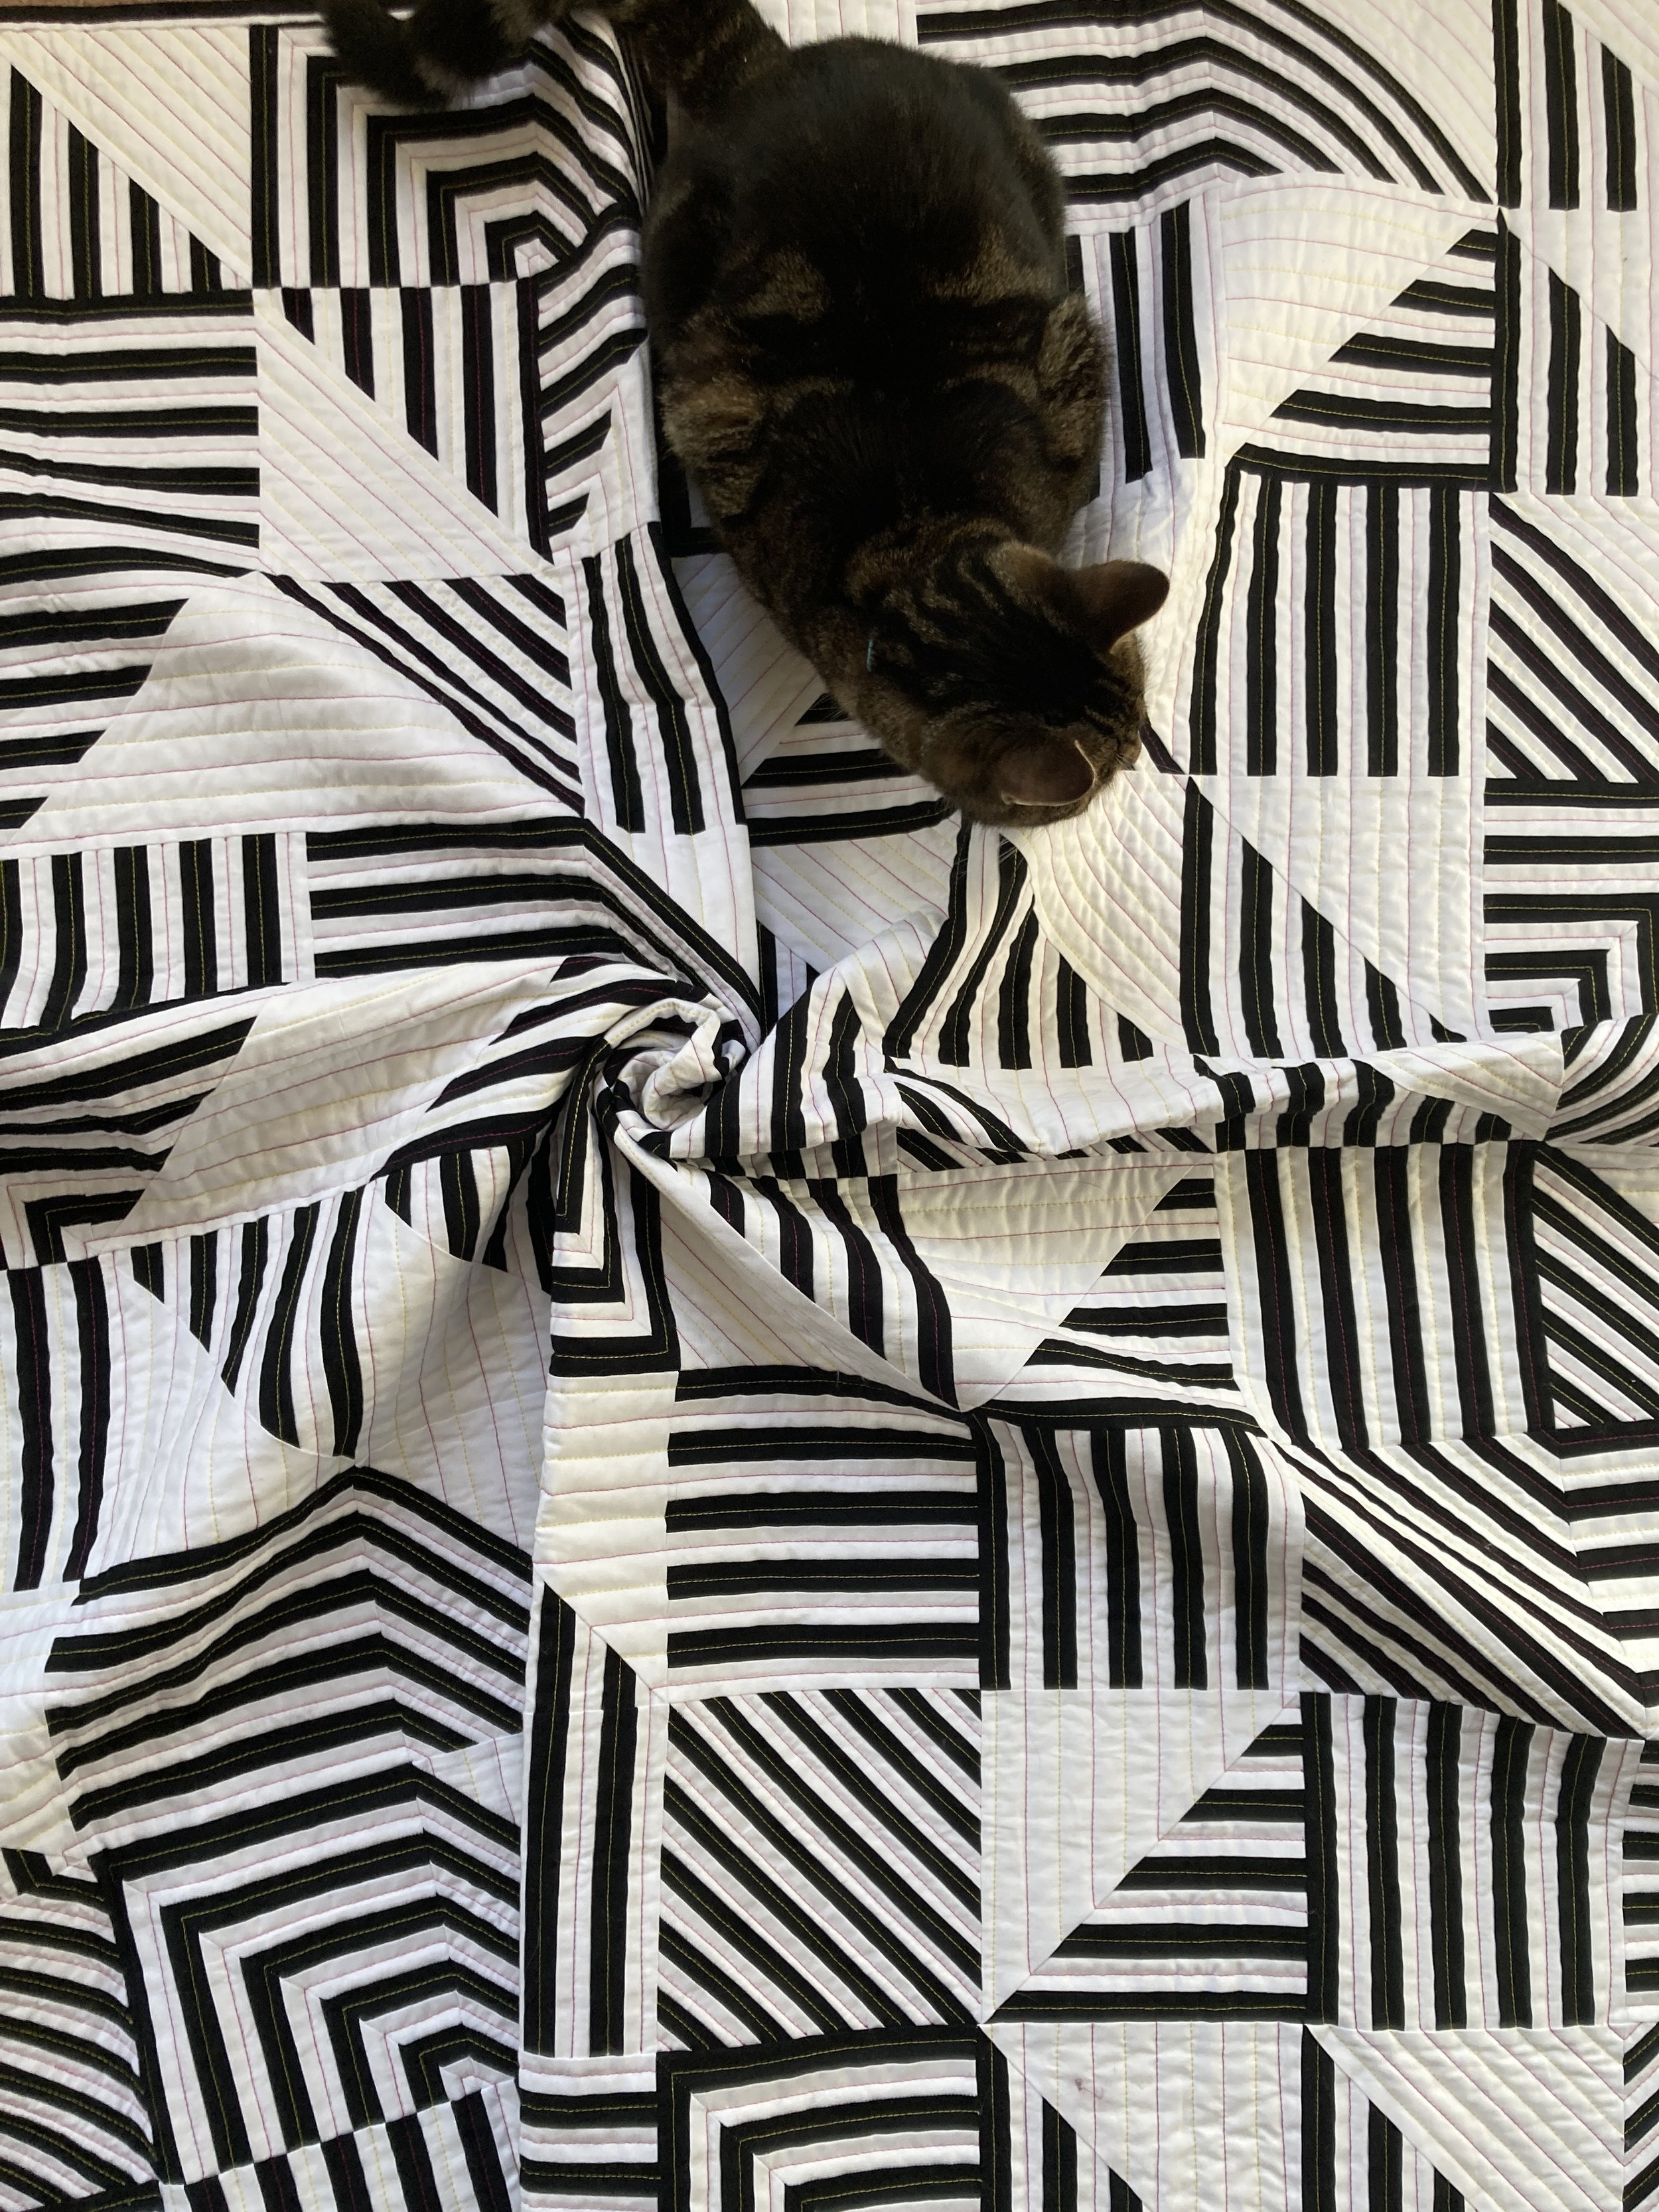
When I designed the Linework Quilt, I have to admit I had absolutely ZERO idea how I was going to quilt it. Normally I have at least a vague idea of what I wanted to do, but this time I had absolutely nothing. Did I want to do an edge to edge design? Should I do a grid on point? Should I use matching thread or go for contrast? If I use contrasting thread would that be too much going on visually? Should I do something organic to contrast with the geometric design? As you can imagine I spent a long time staring at the assembled top torn between so many different options and paralysed by wanting to do the design justice with the ‘perfect’ quilting. Thankfully my wonderful fiancée finally gave me the push I needed to commit to the brave option and go bold with bright yellow and pink threads and a very detailed custom quilting plan.
Thread choice: I used Aurifl 40wt in colours 2120 and 4020
I started with the yellow thread (I wasn’t quite brave enough to start with the bright pink) and broke up the quilt into sections according to where my eye wandered by marking up my lines with a Hera marker. Quilting this design took a looooong time, with a lot of wrestling the quilt back and forth through my machine with much twisting and turning (and a lot of wishing I’d gone for a simpler design!), but oh my do I love the extra dimension it adds to the design. If I was doing it again I might use a thicker thread to add more even contrast, but at the time this was really stretching myself to the edges of my comfort zone and I’m pleased with the overall effect. I’m really glad I chose to use a solid black backing as it looks really cool with the ghost quilting lines showing up so well - it reminds me of a circuit board.
This was my first time trying a flange binding, which of course made perfect sense as a life choice when I was binding the quilt in a huge rush to get a finished photo for the Festival of Quilt submission deadline. After frantically burying all the front threads (time for another confession - the back threads didn’t get buried until literally just before the show), attaching and hand sewing this new type of binding down in two evenings while also teaching a full weekend Intro to Quilting retreat, I learnt that I didn’t actually need a finished photo and a WIP shot would have been absolutely fine. Lesson learned - double check the submission requirements before stitching so much in a day that your fingers bleed!


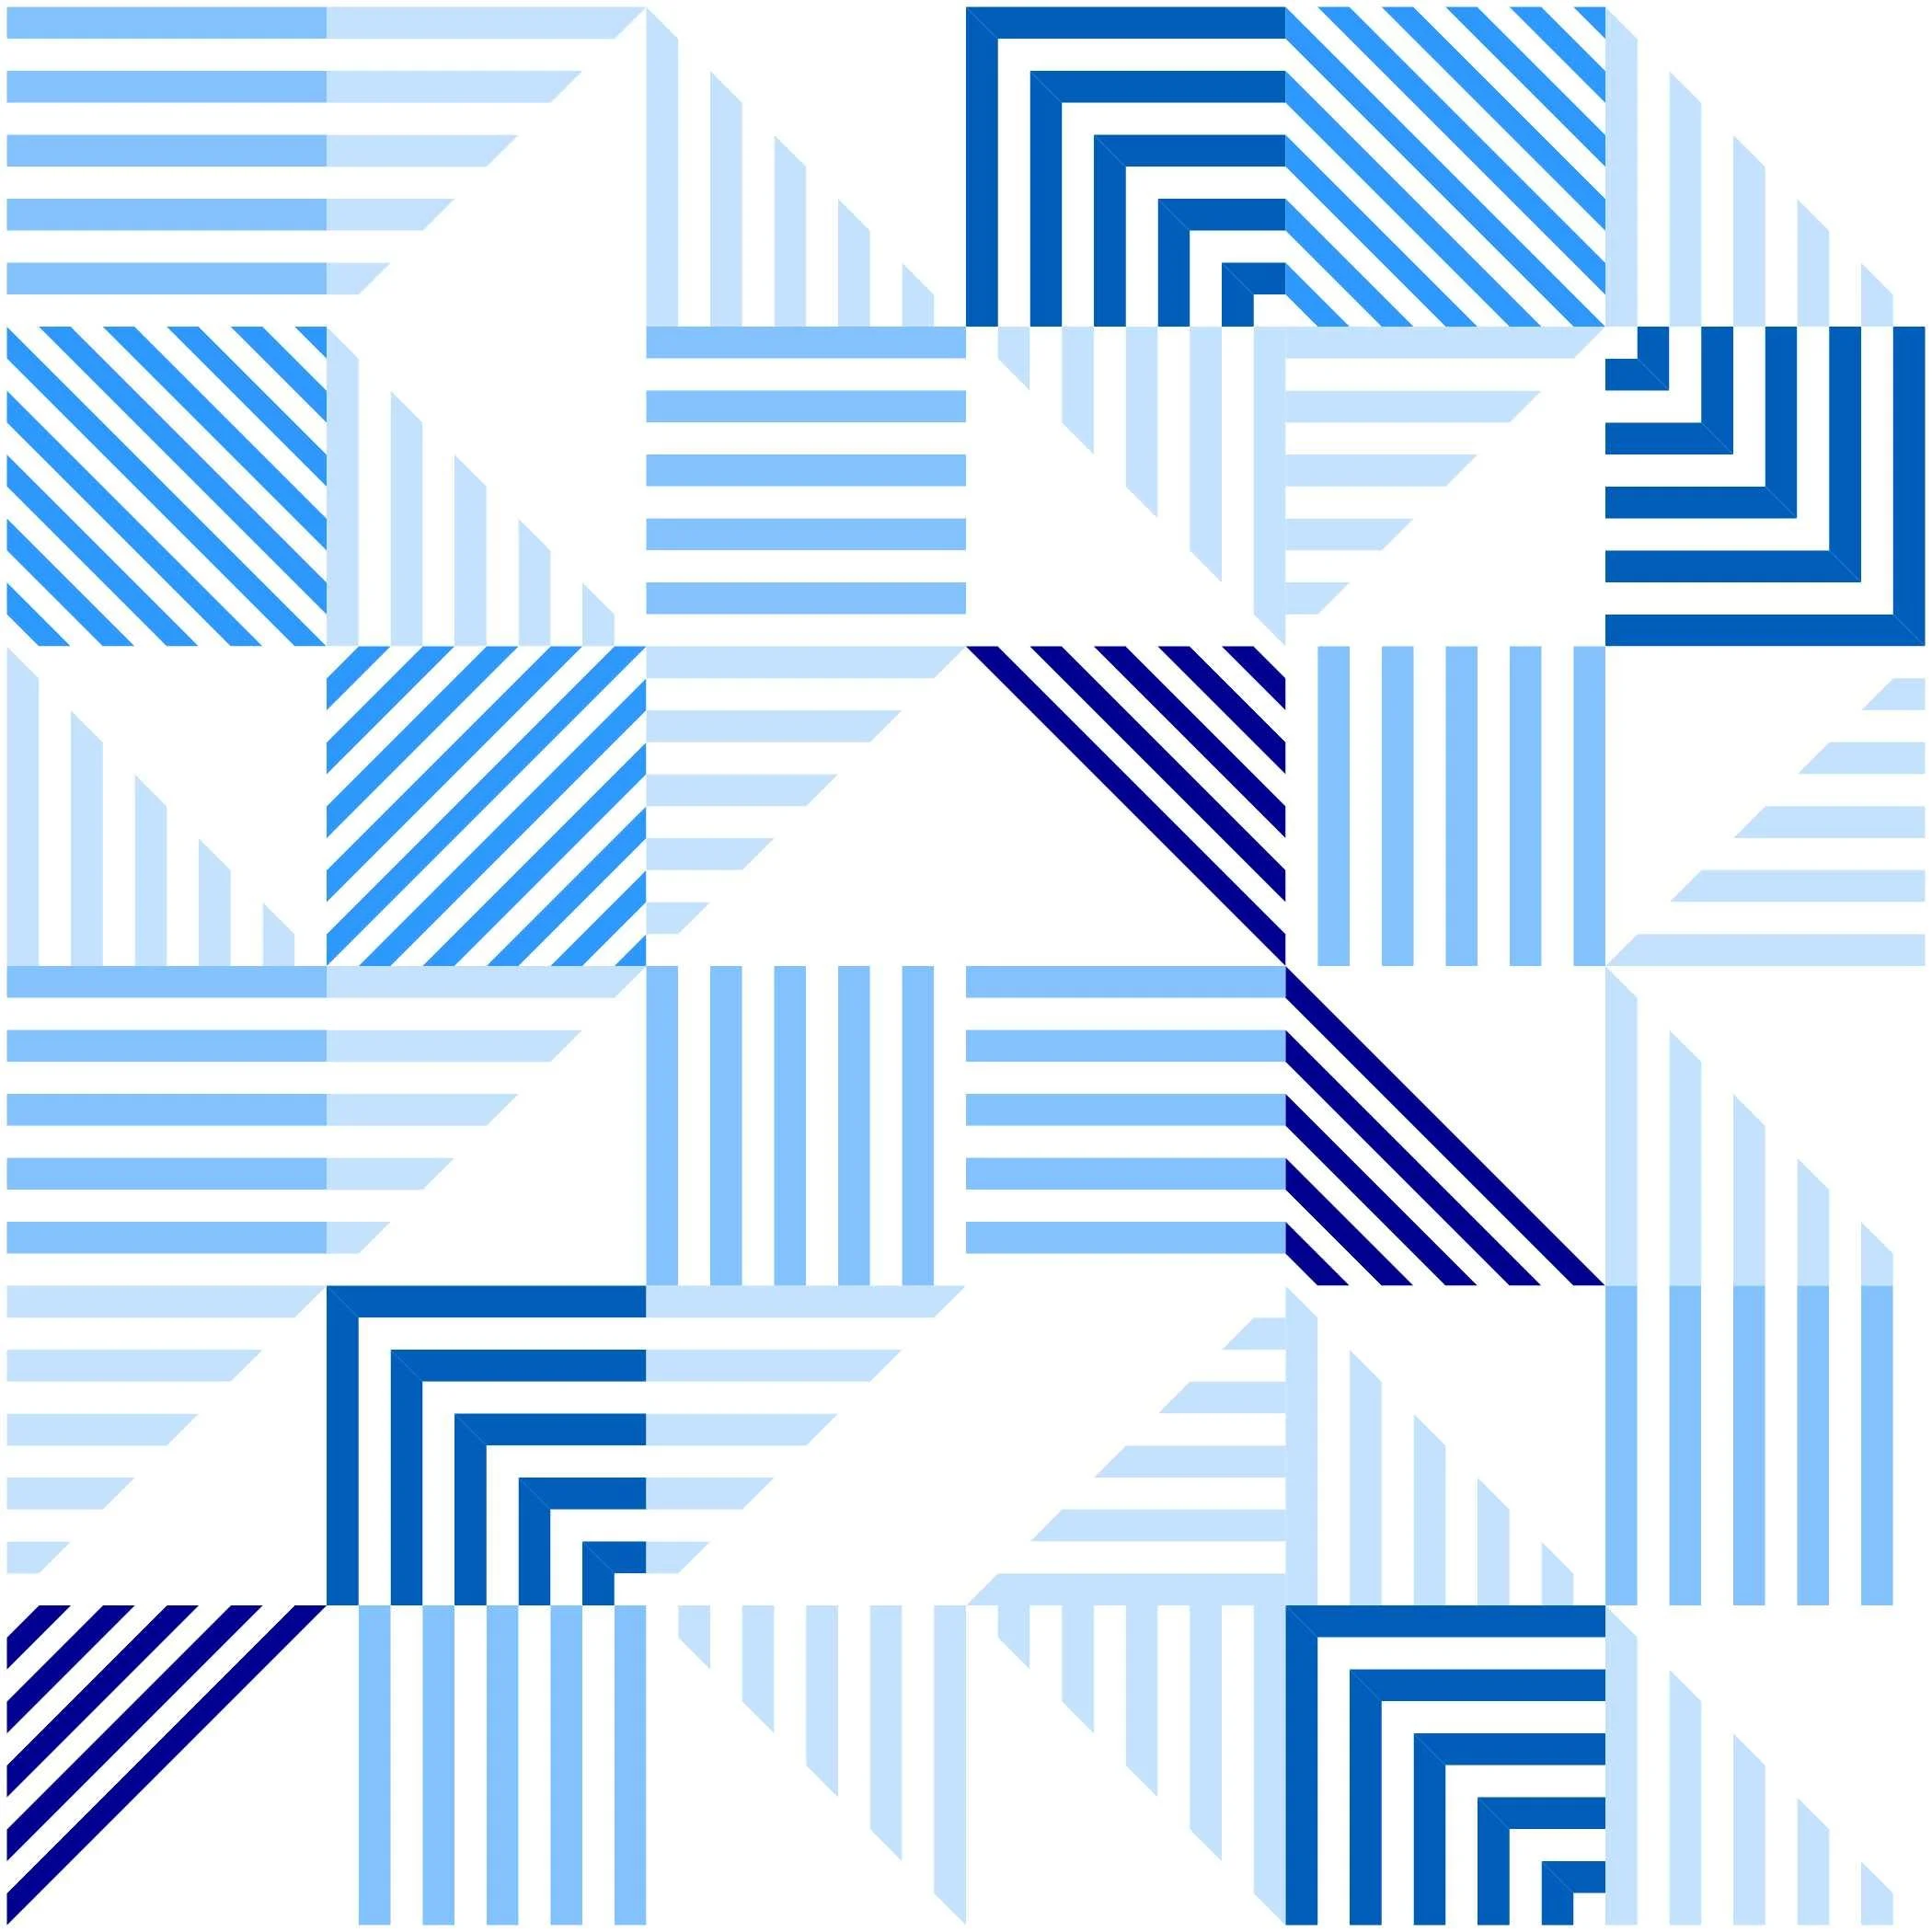
Make it your own with some colour inspiration
One of my favourite things about designing patterns is just how different they can look with different colours! I know how much you all love switching up colours in patterns too, so I had a little play and came up with some colourways to inspire you. Still looking for more inspiration? Don’t forget to check out my tester parade and the #LineworkQuilt hashtag to see some of the amazing fabric pulls my testers came up with.


And there you have it - the Linework Quilt!
You can get your own copy of the pattern now by clicking the button below. Remember, I absolutely love to see your makes, so don’t forget to share your projects with the #LineworkQuilt and #CaitLisleDesigns hashtags!