Exploring my sewing space
For years, I’ve been promising a tour of my studio - and I will get to it…one day! In the mean time, this blog can serve as a bit of an introduction to some of the key aspects of my workspace. I’m pretty satisfied with the space I’ve created so if your New Year’s Resolution is to finally organise your sewing room I hope these tips are helpful!
The space
My current studio is pretty spacious at around 12’ by 11’, however, my first sewing space was in my fiancée’s teeny tiny office, and by “in”, I mean took over. Whoops! As I got more invested in quilting, it became clear that I would need a bigger space when we moved, so it was something we specifically looked for when relocating (alongside a landlord that allowed cats). Now I know not everyone can move just to accommodate their sewing wishes, but even in the space I have I try to save room where possible. It’s really important to me that my studio is a room that I can easily keep tidy as clutter makes it difficult for me to focus. It also needs to be easily adaptable to suit whatever I’m working on (think floor space for basting) so everything needs to have its place. Which brings me onto the first key item…
Pegboards
Pegboards have honestly been a revelation for me. Mine are from IKEA but I know multiple retailers do their own versions. I love how versatile they are; I can add hooks to hold rulers, pots to store notions and miniature shelves to hold endless reels of thread. All this storage and they don’t take up any floor space! They also make it easy for me to see my supplies. A quick glance can tell me if I’m running out of my favourite colour of Aurifil thread (Dove Grey in case you’re interested!). Additionally, they’re sturdier than you would expect. Mine have been swatted by many a cat tail (and even some heads - my cats are not exactly MENSA members) without ever coming loose. The trays also seem to be the perfect depth to protect reels of thread from inquisitive paws, while still being easy for humans to grab from.


Storage Cubbies
Storage being key, I have given an entire wall of my studio to a Kallax. If the Swedish-sounding name didn’t tip you off, this is another IKEA product and I was lucky enough to snag a cheap one second hand from an old colleague looking to downsize. Fitting a very large pile of six foot planks into a tiny smart car was certainly an experience, but the result is more than worth the nervous drive home. The size of mine gives me 25 cubbies which I’ve used mostly for my fabric stash, some WIPs and the paper patterns I sell. Of course, one box is left empty for the obligatory quilt cat snoozing spot.
Something I really enjoy about my storage unit is how adaptable it is. I can leave the cubbies as they are, slot fabric boxes in them, split them into shelves or divide them into drawers. This means I can simultaneously hide any mess or clutter, but also see my fabric. I’ve discovered that having my stash visible makes me far more likely to use it - and that having my WIPs visible definitely guilts me into finishing them!


Cutting Table
My studio has two tables; one at the height of a normal desk and a second that is about a foot taller. This second desk is my cutting table. Again, I know many people don’t have the space to allow this, but it really is a game-changer if you can squeeze one in. Six months of monopolising a dining table and another year of working from a tiny office mean I’m no stranger to manhandling metres of fabric across a tiny table space to slice it up. However, a table dedicated to cutting allows me to constantly have my large cutting mat set up and makes it a lot easier to cut large pieces of fabric. Additionally, the increased height means I’m standing when cutting, rather than hunching. Those who aren’t quilters don’t seem to realise how physical a process it is, so it’s great to have found a way to reduce the inevitable back pain!
Having a cutting table also makes my space as a whole far more adaptable. During the work day I can move my sewing machine and current project onto it to have my desk clear - and then move them back when I’m sewing. Most importantly, it also holds my woollen pressing mat - otherwise known as Lyra’s preferred platform for judging and supervising from.


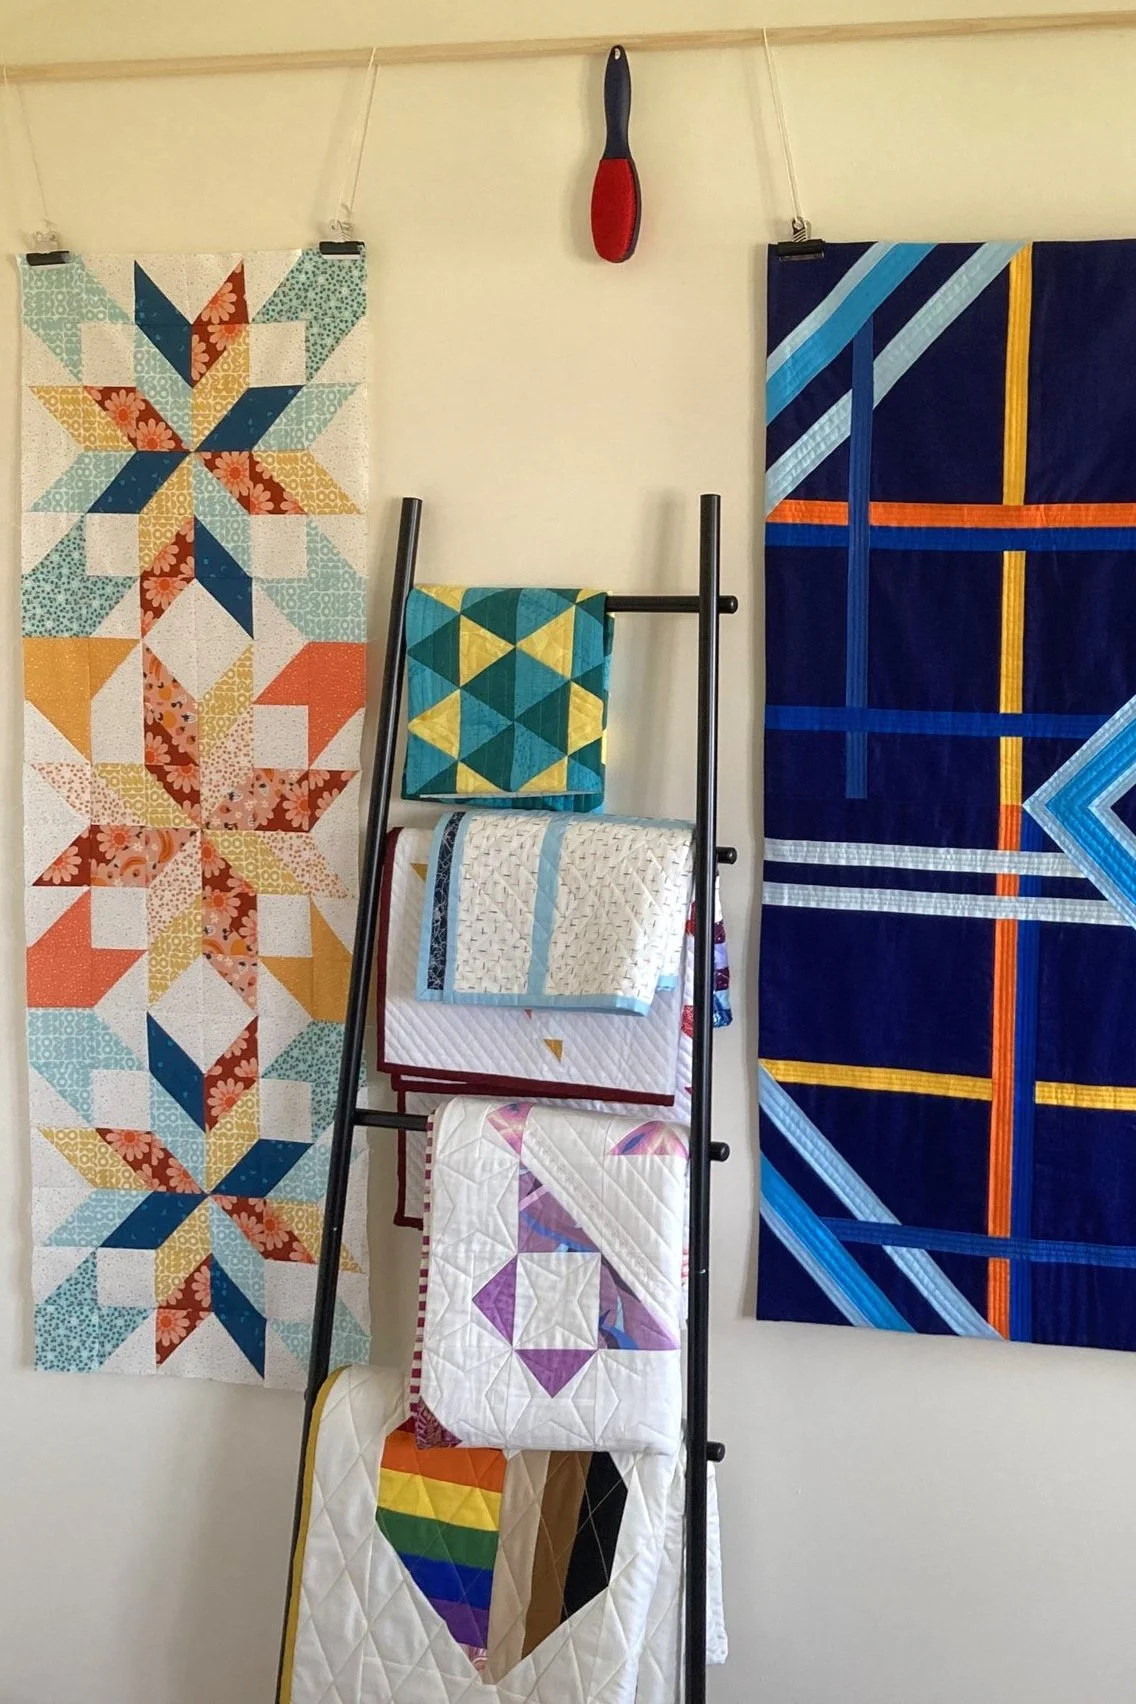
Quilt Wall
Many of my early Quilts in the Wild photos involved contraptions of string and bulldog clips. With one of my studio walls left bare, it only made sense to replicate this inside! While a large part of hanging a quilt on my wall is for aesthetics, it is undeniably helpful for spray basting. If you’ve ever tried to spray baste on the floor while at least one furry friends tries to “help” then you know what I’m talking about.
Again, having a quilt wall only takes up vertical space and just required some dowel and string to assemble. I love that it allows me to have a bright rainbow or more monochromatic display - and it’s easy to change with my mood. Finally, it reminds me of what I’ve achieved; looking at a quilt I’m proud of hanging on my wall reminds me of how far I’ve come and how much I love quilting.