
Sew Scrappy with English Paper Piecing
As a self-professed modern quilter, it may be a little surprising that I’m a big fan of English Paper Piecing (or EPP) as it’s a very traditional technique dating all the way back to the late 1700s. Well, just as hand quilting can be modern or traditional (learn how here), I say EPP can be anything you want it to be!
Stitching a quilt by hand has so many positives -
You can get perfectly precise corners and matching points easily
You don’t need any fancy or expensive kit
It gives you time to slow down and spend some quality (quilty!) time with your make
Hand sewing adds an extra special touch to a quilt that instantly oozes heirloom
It’s super portable and can easily be done on the sofa while watching TV and snuggling under the quilt top before it’s even finished
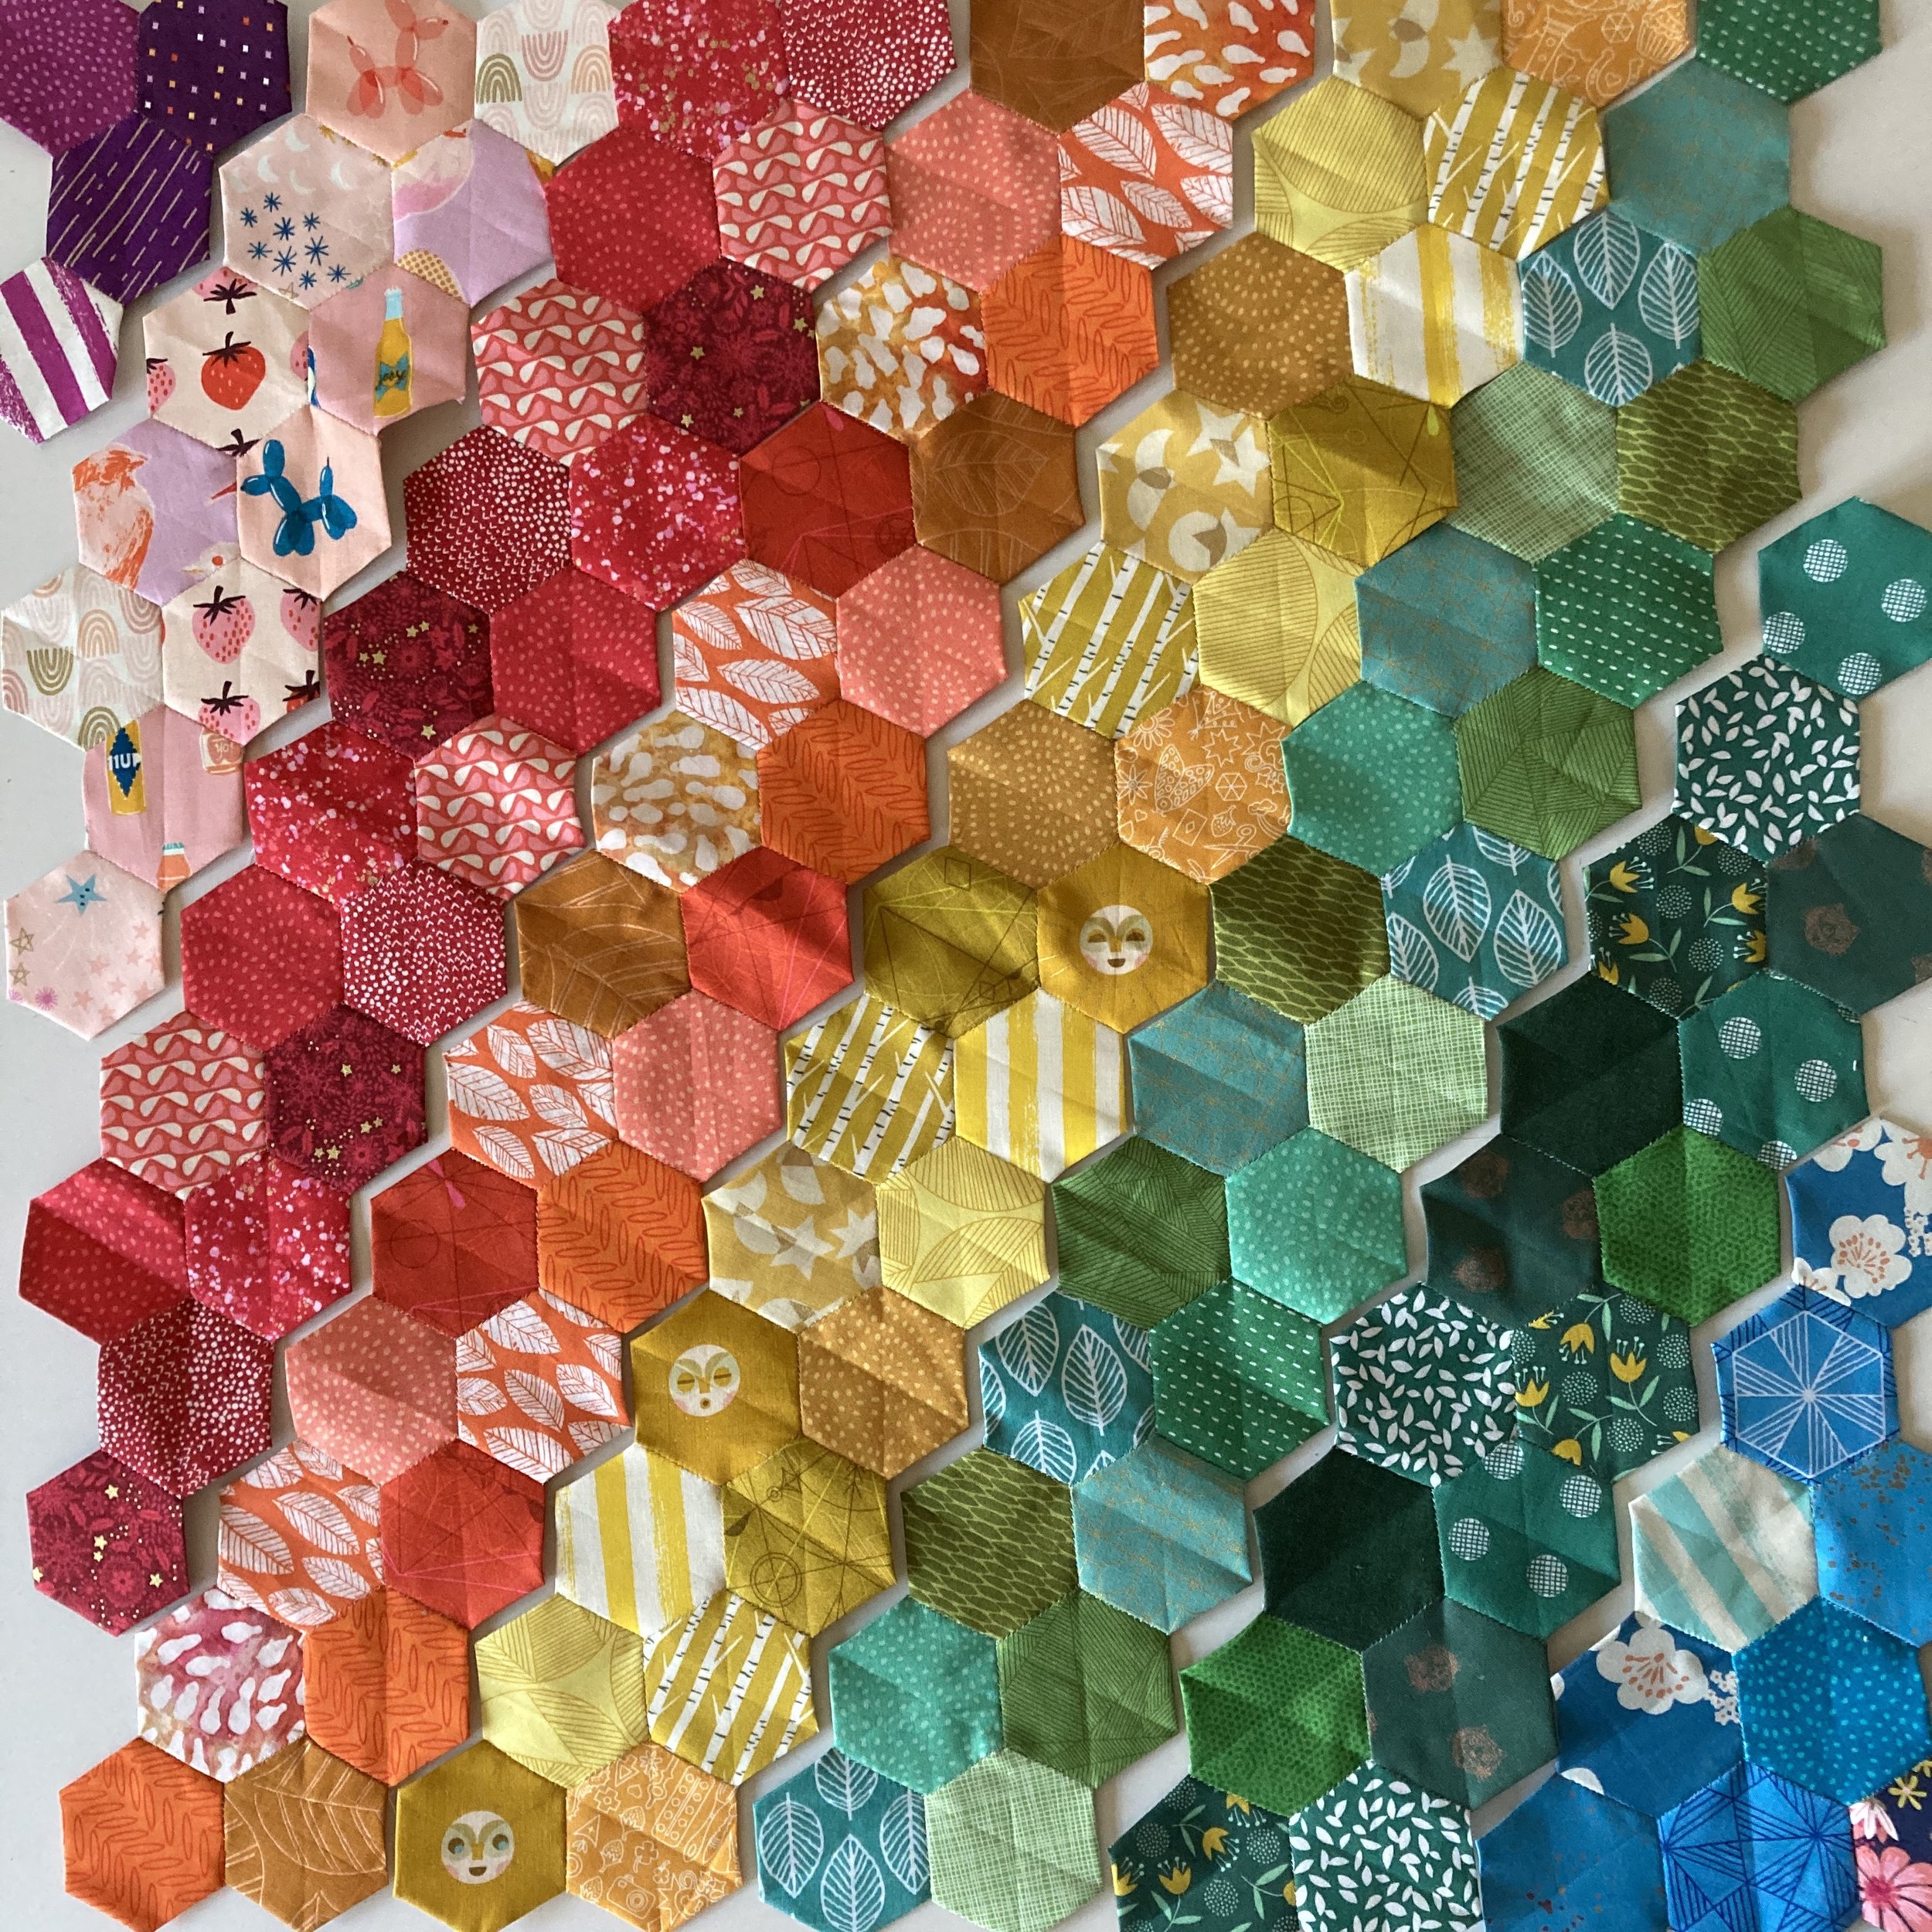
And just as any quilt can look traditional or modern, the final look of an English Paper Pieced quilt can be as modern or traditional as you want depending on your fabric and pattern choices.


How to English Paper Piece
So now I’ve won you over to the magic of EPP, you probably want to give it a go yourself! Here’s my beginner’s guide to get you started. All my diagrams show hexagons (hexies as they’re more commonly called) as they’re the easiest beginner shape - no tricky acute angles or curved edges to contend with while you get to grips with the technique and they nest together really easily.
kit
You really don’t need anything fancy to do some EPP of your own - no sewing machines here! - but here are my must-haves:
Paper pattern pieces
Quilting cotton
Good quality thread (I recommend Aurifil 50wt in a colour matching my fabric)
Embroidery needle size 7 (or smaller depending on your thread)
Embroidery scissors/snips
Optional: Temporary fabric glue (I recommend the refillable SewLine glue pen)
Cutting
To get started you’re going to need to cut some fabric. Cut out your fabric cutting template including the 1⁄4” seam allowance. If the pattern you’re using doesn’t have one, you can easily make your own by tracing the pattern piece shape onto some paper and adding a 1/4” border round the edge. Once you’ve done that there are two ways to cut your fabric: tracing before cutting or cutting without marking. Pick your preferred method and cut out all the pieces you need.
Method 1: Lay the fabric cutting template over your fabric, mark the outline of the template, remove the template and cut around the outline using scissors or a rotary cutter.

Method 2: Hold the template in place and use a rotary cutter or scissors to cut out without marking.


Basting
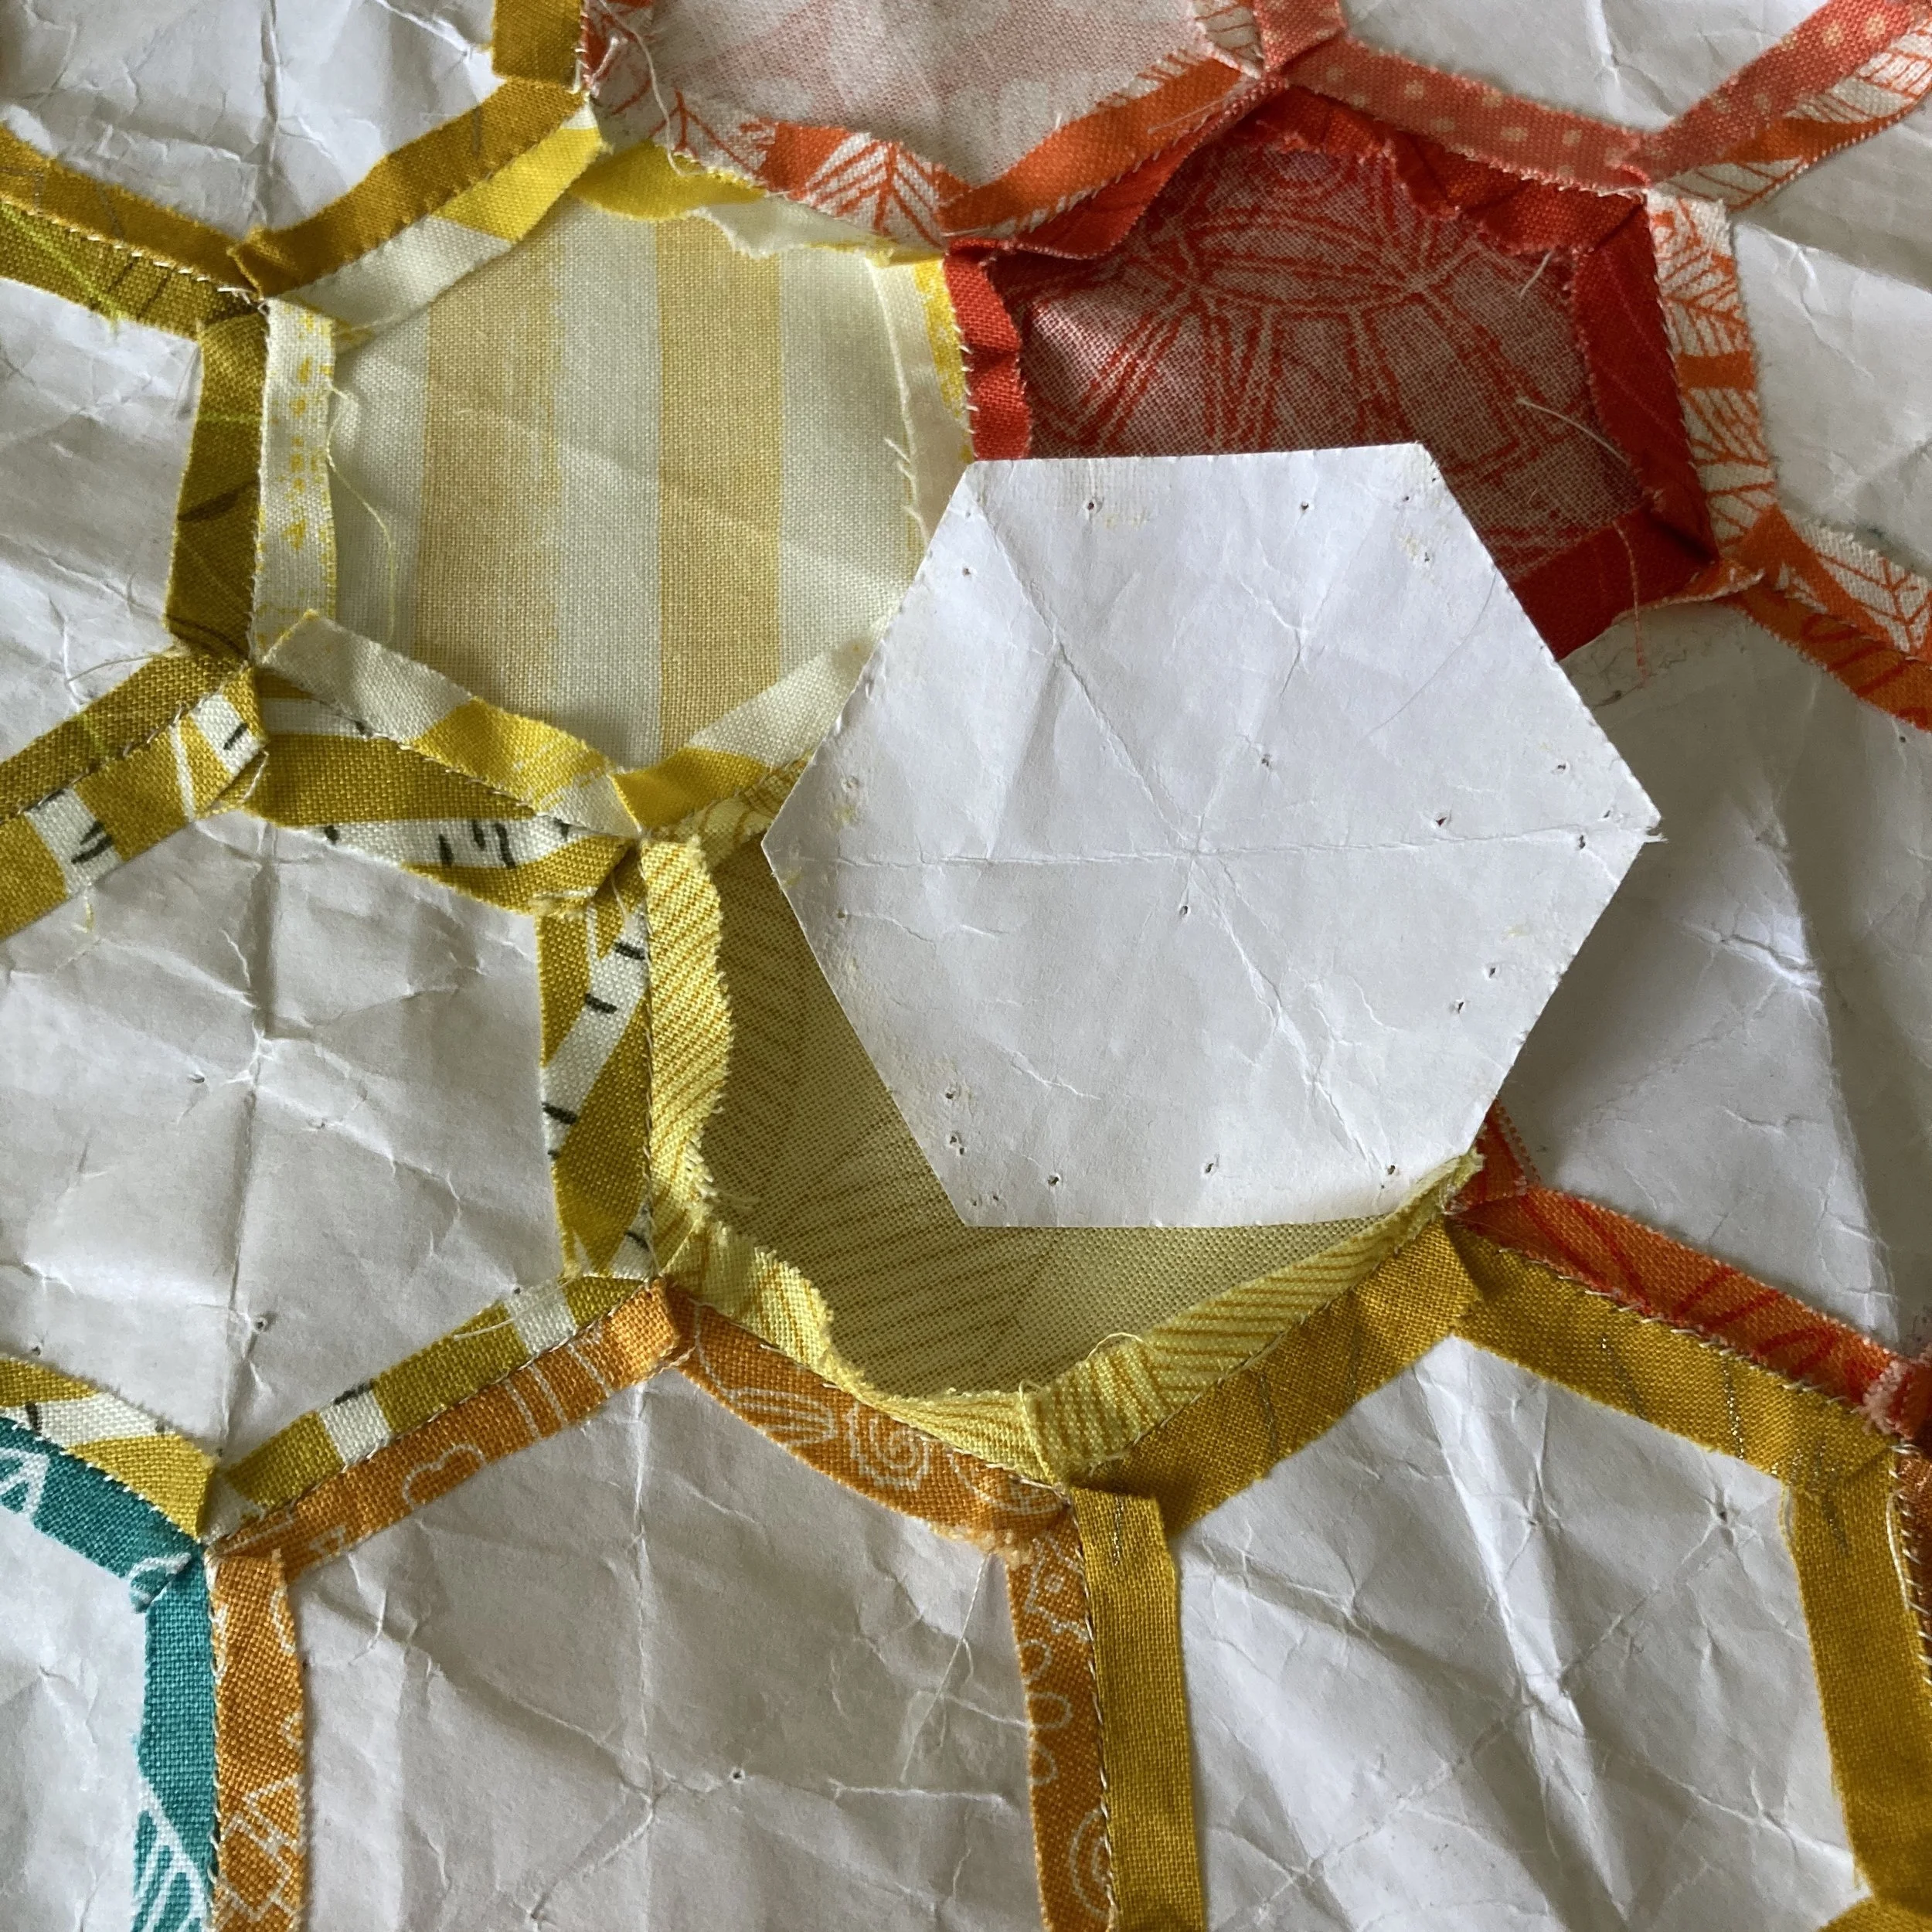
To get those lovely crisp edges and sharp points characteristic of EPP, it’s important to carefully baste (temporarily attach) your cut fabric wrong sides together with your paper pattern pieces before stitching. When basted, your fabric should be right side out on one side of the paper template—this is the fabric that will show in your assembled quilt top.
Depending on where you are geographically you might call this process basting or tacking - both are correct and can be used interchangeably!
Glue Basting: Draw a small line of temporary sewing glue on the wrong side of your fabric along each side of the hexie. Fold over the seam allowance of each side in turn (1-6) making sure that the fabric folds exactly along the edge of the paper template and your corners are nice and sharp.

Thread Basting: Folding each side carefully over in turn (1-6), use long tacking stitches running from corner to corner to secure the fabric to the template.
TIP Use a contrasting thread colour so it’s easier to spot when removing your papers at the end of your project!

TIP You can reuse papers! As long as they’re not ripped or warped out of shape they can be used again and again, even if they’re a bit crumpled from folding. Just give them a quick press with a warm iron for 5 seconds and they’ll be good to go.


Stitching
Place two tacked pieces right sides together making sure to precisely align the side you’re going to sew. Insert your needle between the paper and seam allowance of the top piece approx. 2mm from your starting corner (hiding your thread knot between the layers). Whip stitch to the corner taking care to only catch the top one to three fabric threads of each piece then work back across to the opposite corner. Make sure that your stitches are tight and even and leave no gap between your pieces.
TIP Take care to ensure your pieces are correctly orientated before starting to sew, especially if you’re using directional fabric!

Sew your pieces together in the desired order, folding as needed to ensure you are always sewing along a flat edge.
TIP To secure your thread at the end of a section or when changing thread, bring your needle up in the seam allowance (away from the edges) and either make a small knot or do three to four small stitches in place to secure and trim thread tail.


Finishing
When you’ve sewn all your pieces together, it’s time to remove the papers. If you glue basted simply gently peel back the seams from the paper to remove the template, while if you thread basted just snip and remove the threads and pop out the template.
TIP If you want to remove some papers before you’re finished, for example you’re working on a big quilt with lots of repeated shaped and don’t want to cut out hundreds of individual templates, you can remove them as you go just make sure that any any you take out are fully secured i.e. all the shapes around them are fully stitched and there are no loose seams that would pull the fabric out of shape.
Once the papers are all out, treat it just like any other quilt top!


And there you have it!
Have you tried EPP? Share your thoughts and questions in the comments below!